●自動起動して、その後一定時間毎に起動させる
一つのクラスに処理を書くだけで自動起動で処理を実行して、次の実行時間をスケジュールして繰り返し実行するとか
裏方で動かすアプリケーションにぴったりな方法を探していました。
サービスを作ったりとかすると、なかなか複雑なプログラムでイライラしてきます。
そこで思いついたのが、AlarmManagerも電源ON時の自動起動もBOOT_COMPLETEDを受け取るということです。
ただ、AlarmManagerと自動起動の違いはBroadcastReceiverのonReceiveメソッドの引数、Intentが違うだけみたいです。
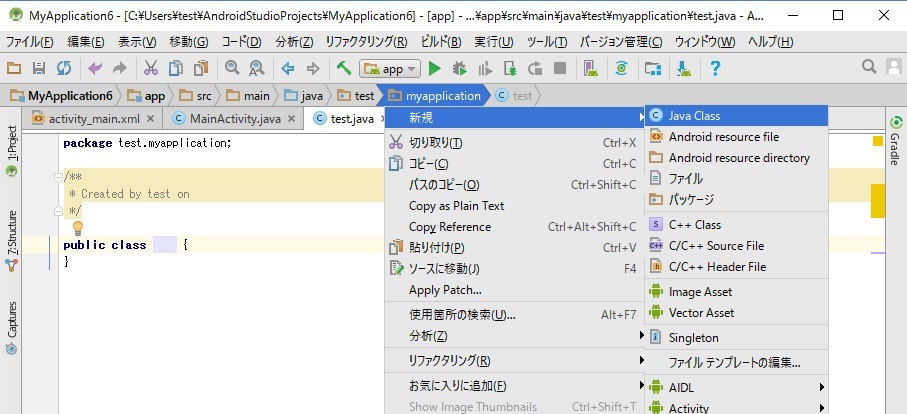
そこで、timer.javaというクラス(ファイル)を作成して、BroadcastReceiverを継承した次のようなプログラムを書いてみました。
public class timer extends android.content.BroadcastReceiver {
    public void onReceive(android.content.Context context, android.content.Intent intent) {
        //音を鳴らす
        android.media.ToneGenerator tg;
        tg = new android.media.ToneGenerator(android.media.AudioManager.STREAM_SYSTEM, android.media.ToneGenerator.MAX_VOLUME);
        tg.startTone(android.media.ToneGenerator.TONE_DTMF_0,100);

        //現在の時間を取得して1分後の時間を作る
        java.util.Calendar calendar = java.util.Calendar.getInstance();
        //calendar.set(java.util.Calendar.SECOND,0);
        calendar.add(java.util.Calendar.MINUTE,1);

        //画面に次のアラームのセット時間を表示
        java.text.SimpleDateFormat sdf = new java.text.SimpleDateFormat("yyyy/MM/dd HH:mm:ss");
        String str = sdf.format(calendar.getTime());
        android.widget.Toast t=android.widget.Toast.makeText(context,str, android.widget.Toast.LENGTH_LONG);
        t.show();

        //アラームをセット
        android.content.Intent _intent;
        _intent=new android.content.Intent(context,this.getClass());
        android.app.PendingIntent pendingIntent = android.app.PendingIntent.getBroadcast(context, 0, _intent, android.app.PendingIntent.FLAG_CANCEL_CURRENT);
        android.app.AlarmManager am = (android.app.AlarmManager) context.getSystemService(android.content.Context.ALARM_SERVICE);
        am.set(android.app.AlarmManager.RTC, calendar.getTimeInMillis() , pendingIntent);
    }
}
このクラスではメッセージを受信したときに、音を鳴らして次の実行スケジュールを登録します。
赤文字部分で次の1分後の時間を計算してスケジュールをセットしています。
次にAndroidManifest.xmlを開いて自動起動を受信できるようにします。
<?xml version="1.0" encoding="utf-8"?>
<manifest xmlns:android="http://schemas.android.com/apk/res/android"
    package="jp.myapplication">
    <uses-permission android:name="android.permission.RECEIVE_BOOT_COMPLETED" />
    <application
        android:allowBackup="true"
        android:icon="@mipmap/ic_launcher"
        android:label="@string/app_name"
        android:supportsRtl="true"
        android:theme="@style/AppTheme">

        <receiver android:name=".timer">
            <intent-filter>
                <action android:name="android.intent.action.BOOT_COMPLETED" />
            </intent-filter>
        </receiver>

        <activity android:name=".MainActivity">
            <intent-filter>
                <action android:name="android.intent.action.MAIN" />

                <category android:name="android.intent.category.LAUNCHER" />
            </intent-filter>
        </activity>
    </application>
赤文字部分を追加することによりAndroid起動時の自動起動が実現できます。
ただし、アプリをインストールしてから一度実行しないと自動起動しません。
もし、アプリケーションのアイコンを直接クリックしたときにも実行したいならば、
MainActivityの部分で次の様に書いておくとアプリ起動時にも目的の処理が実行されるようになります。
public class MainActivity extends AppCompatActivity {

    @Override
    protected void onCreate(Bundle savedInstanceState) {
        super.onCreate(savedInstanceState);
        setContentView(R.layout.activity_main);

        android.content.Intent intent = new android.content.Intent(getApplicationContext(), timer.class);
        new timer().onReceive(getApplicationContext(),intent);
    }
}
作成したアプリケーションをインストールして一度実行すると、(一度実行しないと自動起動しない)
Androidの起動で実行され、一定時間毎にも目的の処理が実行されるはずです。
しかし、BOOT_COMPLETED を onReceive で処理している最中はプロセスが生きていますが、onReceiveを抜けてしまうと
プロセス自体が終了してしまいます。
そのため時間のかかる処理をしようと、ThreadをonReceive内で立てたとしても即座にプロセスごと終了してしまいます。
時間のかかる処理はサービスを起動させて処理しないといけないです。
■サービスから長い時間かかる処理を実行する
シーケンシャルな処理なら普通のサービスではなくてシステムが色々やってくれる便利なIntentServiceを使った方がよいです。
onHandleIntentに記述した処理が終了したら自動的にServiceを終了してくれますし、処理が終わらないならずっと回り続けてくれます。
まずは、testService.javaというクラスファイルを追加しました。
作成したファイルの中に次のサービス本体のプログラムを書き込みます
public class testService extends android.app.IntentService {
    android.media.ToneGenerator tg = new android.media.ToneGenerator(android.media.AudioManager.STREAM_SYSTEM, android.media.ToneGenerator.MAX_VOLUME);
    public testService() {
        super("testService");
    }

    @Override
    protected void onHandleIntent(android.content.Intent intent) {
        while(true) {
            try {
                Thread.sleep(1000);
            }catch(Exception e){}
            //音を鳴らす
            tg.startTone(android.media.ToneGenerator.TONE_DTMF_0,5);
        }
    }
}
IntentServiceを継承したサービスを作成しました。
時間のかかる処理を行う関数のonHandleIntent内では、無限ループにより1秒毎に音が鳴るようになっています。
別に無限ループではなくてもこの関数が終了したら後始末はIntentServiceが行ってくれるので安心です。
次にサービスをAndroidManifest.xmlに登録します。
AndroidManifest.xmlを開いて次の赤文字部分のように追加します。
<?xml version="1.0" encoding="utf-8"?>
<manifest xmlns:android="http://schemas.android.com/apk/res/android"
    package="jp.myapplication">
    <application>

        <receiver android:name=".timer">
            <intent-filter>
                <action android:name="android.intent.action.BOOT_COMPLETED" />
            </intent-filter>
        </receiver>

        <service android:name=".testService" />

        <activity android:name=".MainActivity">
            <intent-filter>
                <action android:name="android.intent.action.MAIN" />

                <category android:name="android.intent.category.LAUNCHER" />
            </intent-filter>
        </activity>
    </application>
</manifest>
これで、サービス本体の作成は完了しました。
自動起動などのブロードキャストレシーバーからこのサービスを起動するにはstartServiceによって行います。
もちろん通常のアプリからもstartServiceによって行います。
public class timer extends android.content.BroadcastReceiver {
    public void onReceive(android.content.Context context, android.content.Intent intent) {
        context.startService(new android.content.Intent(context, testService.class));
    }
}
起動されると画面ON・OFFやアプリケーションが起動していないに関係なく1秒毎に音が鳴り続けます。
▼シーケンシャルじゃない処理を通常のサービスで実行する
IntentServiceでGPSの位置情報を取得するなどのマルチスレッドの処理をした場合、勝手に終了してしまうことがあります。
通常のサービスならば、実行開始時に作成されたオブジェクトをある程度は生き続けさせることができるため、
位置情報取得後のなんらかの処理などの時間のかかる処理などもきちんと動かす事ができます。
まずは、testService.javaというクラスファイルを追加しました。
作成したファイルの中に次の空のサービス本体のプログラムを書き込みます。
public class testService extends android.app.Service
{
    @Override
    public android.os.IBinder onBind(android.content.Intent intent)
    {
        return null;
    }

    @Override
    public void onCreate(){
        //サービスが作成され初期化された時に一度だけ動く部分
    }

    @Override
    public int onStartCommand(android.content.Intent intent, int flags, int startId) {
        //startServiceでサービスを起動させた場合に毎度動く部分
        return super.onStartCommand(intent, flags, startId);
    }

    @Override
    public void onDestroy() {
        //サービスが破棄される時の後始末
    }
}
AndroidManifest.xmlへのサービスの登録は上のIntentServiceと同じです、同じように登録してください。
またサービスの起動方法もIntentServiceと同じです。
startServiceでこのサービスが起動されると、起動している起動していないにかかわらずonStartCommand()が毎回実行されます。
サービスに何かさせたいときはonStartCommand()内に処理を書き込んだほうがよさそうです。
通常のサービスについて細かい事はサービスの作成にて。
■ブロードキャストを送信してBroadcastReceiverのonReceiveメソッドを起動させる
MainActivityから起動させる場合、直接メソッドをコールすればいいのですが、それではちょっとスマートではないので、
自分自身にブロードキャストを送信したいと思います。
まずは、ブロードキャストを送信するコード
public class MainActivity extends AppCompatActivity {

    @Override
    protected void onCreate(Bundle savedInstanceState) {
        super.onCreate(savedInstanceState);
        setContentView(R.layout.activity_main);
        android.content.Intent _intent;
        _intent=new android.content.Intent("test");
        sendBroadcast(_intent);
    }
}
testという名前のブロードキャストが送信されます。
もちろんブロードキャストですから他のアプリも受信しますので、重複しない名前にしないといけません。
本来ならパッケージ名を含めて重複しないようにすることが必要です。
次にAndroidManifest.xmlを開いて目的のブロードキャストを受信できるようにします。
<receiver android:name=".timer">
    <intent-filter>
        <action android:name="android.intent.action.BOOT_COMPLETED" />
        <action android:name="test" />
    </intent-filter>
</receiver>
赤文字部分を追加することによりtestブロードキャストの受信ができるようになります。
BOOT_COMPLETEDでシステムから起動したサービスはバックグラウンドでずっと動き続けますが、
MainActivityからサービスを起動させた場合には、アプリが落ちると一緒にサービスも終了しますので注意が必要です。
■サービスからGPSの位置情報を取得する
通常のサービスを使うとGPSの位置情報を一定時間毎に取得してなんらかの処理を行うことができます。
時間毎に位置情報を取得するには、ブロードキャストレシーバーからサービスを起動させると動き出します。
位置情報ついて細かい事は位置情報を取得するにて。
下がサービスからGPS位置情報を取得するコードです。
public class service extends android.app.Service
{
    // GPS用
    static private android.location.LocationManager locationManager=null;
    static private _LocationListener locationListener=null;
    //タイムアウト用
    static private java.util.Timer timer;

    @Override
    public android.os.IBinder onBind(android.content.Intent intent)
    {
        return null;
    }
    @Override
    public void onCreate(){
    }
    @Override
    public int onStartCommand(android.content.Intent intent, int flags, int startId) {
        locationManager = (android.location.LocationManager) getSystemService(android.content.Context.LOCATION_SERVICE);
        locationListener = new _LocationListener();

        if (locationManager.isProviderEnabled(android.location.LocationManager.GPS_PROVIDER)) {
            //requestLocationUpdates(プロバイダー,通知の最小時間間隔(ms),通知の最小距離間隔(m),リスナー);
            locationManager.requestLocationUpdates(android.location.LocationManager.GPS_PROVIDER, 0, 10, locationListener);

            //タイムアウトを作るため、タイマーに位置情報取得キャンセルをスケジュールする
            java.util.TimerTask tt = new java.util.TimerTask() {
                android.os.Handler handler = new android.os.Handler();

                @Override
                public void run() {
                    locationManager.removeUpdates(locationListener);

                    //ステータスバーにメッセージを表示
                    android.support.v4.app.NotificationCompat.Builder builder = new android.support.v4.app.NotificationCompat.Builder(getApplicationContext());
                    builder.setSmallIcon(R.mipmap.ic_launcher);
                    builder.setContentTitle("位置情報取得できず");
                    builder.setContentText("タイムアウトしました");
                    builder.setAutoCancel(true);//メッセージをスワイプしたら消す
                    android.support.v4.app.NotificationManagerCompat.from(getApplicationContext()).notify(1, builder.build());
                }
            };
            timer = new java.util.Timer(true);
            timer.schedule(tt, (long)3* 60 * 1000);//3分でスケジュール
        }
        return super.onStartCommand(intent, flags, startId);
    }
    @Override
    public void onDestroy() {

    }
    class _LocationListener implements android.location.LocationListener {
        @Override
        public void onLocationChanged(android.location.Location location) {
            //タイムアウトをキャンセル
            timer.cancel();
            //位置情報が取得できたため、取得を停止する
            locationManager.removeUpdates(this);
            //位置情報を文字列に変換
            String str=location.getLatitude() + " " + location.getLongitude();

            //ステータスバーにメッセージを表示
            android.support.v4.app.NotificationCompat.Builder builder = new android.support.v4.app.NotificationCompat.Builder(getApplicationContext());
            builder.setSmallIcon(R.mipmap.ic_launcher);
            builder.setContentTitle("位置情報");
            builder.setContentText(str);
            builder.setAutoCancel(true);//メッセージをスワイプしたら消す
            android.support.v4.app.NotificationManagerCompat.from(getApplicationContext()).notify(1, builder.build());
        }

        @Override
        public void onProviderDisabled(String provider) {}
        @Override
        public void onProviderEnabled(String provider) {}
        @Override
        public void onStatusChanged(String provider, int status, android.os.Bundle extras) {}
    }
}
位置情報取得後のonLocationChanged内でネットワーク処理などのスレッドを立てて処理してもきちんと動作しました。
▲トップページ
>
android